As an Amazon Associate this site earns from qualifying purchases.
Recommended Products at a Glance
| Product | Best For | Price | Link |
|---|---|---|---|
| 2 Gallon Glass Fermentation Jar | Standard 1F vessel | Check price on Amazon | Check Price on Amazon |
| Kombucha Heating Wrap w/ Digital Control | Cold-house brewers | Check price on Amazon | Check Price on Amazon |
| TOMO 3L Stoneware Crock | Continuous brew | See the product list on this page | Check Price on Amazon |
Reviewed by the BrewCrock Editorial Team
Last Updated: June 2026 | Written by The BrewCrock Editorial Team | 12-minute read
Steep black or green tea, dissolve sugar, cool to room temperature, then add a SCOBY plus a cup of starter liquid to a wide-mouth glass vessel. Cover with breathable cloth, leave it at 72-78°F for 7-14 days. That's raw kombucha. Everything below is what separates a flat, vinegary disappointment from a brew that rivals the $4.50 bottles at Whole Foods.
Let's be honest. You're here because somewhere between the third overpriced bottle at the grocery store and that one Instagram reel showing a glowing amber jar on a sunlit windowsill, you decided you were going to make this yourself.
Good. You absolutely can. And it's going to taste better than what you've been buying.
Our editorial team has been running side-by-side ferments for the better part of a year — three vessels, two heating setups, more SCOBYs than we'd like to admit. Every recommendation below survived a real countertop. Nothing here came from a manufacturer brochure.
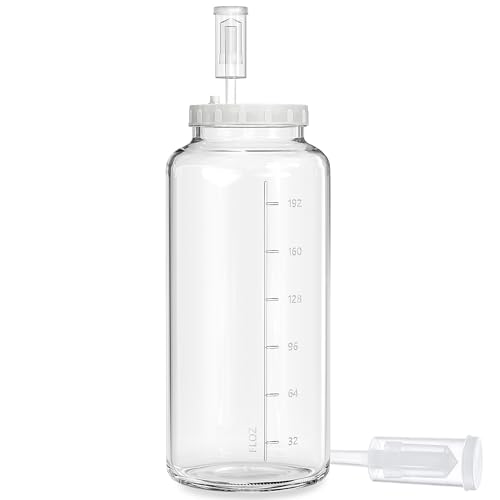
- With 4.3” Wide Opening And Scale Mark: The wine-making kit has a 4.3” wide opening, is easily put in your pickled food and cleaned it by hand effortlessly. In addition, this
- 100% Sealing Screw On lid: The sealing lid with a gasket and a hole plug ensures optimal tightness and functionality. The hole plug design even facilitates fermentation with an
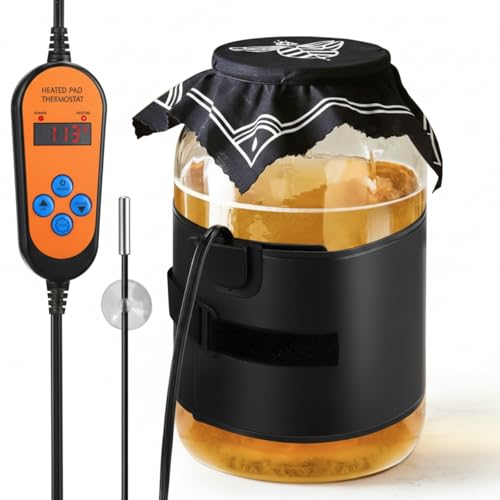
- 【Accurate Temperature Control】the kombucha heating wrap has a heating temperature range of 45-113°F (5°C-45°C) and comes with a temperature controller that allows you to
- 【2 Modes of Timing Function】the sourdough starter warmer has 2 modes of timing; Mode 1: set the working time according to your needs (0-24 hours); Mode 2: keep working all the
The Kombucha-at-Home Reality Check
"The first time I tasted my own kombucha, I almost cried. Not because it was perfect — it wasn't — but because I made it. From sugar and tea. In a jar. On my counter."
— A reader email we still keep pinned
Watch It Done Right (Before You Start)
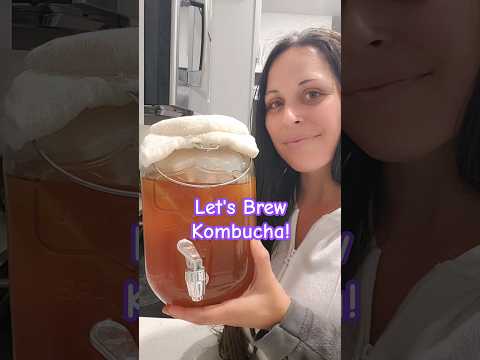
Reading is one thing. Seeing the SCOBY get pitched, the cloth tied off, the first cloudy strands of yeast forming — that's what makes it click. Spend six minutes here before you boil a single cup of water.

What You Actually Need (And What You Don't)
Forget the $200 "starter kits" with branded aprons and motivational stickers. Here's the honest, no-nonsense list of what belongs on your counter.
- A healthy SCOBY — the rubbery pancake that does all the work
- One cup of starter liquid — raw, unflavored kombucha from a previous batch
- Plain black or green tea — loose leaf or bagged, no flavorings, no oils
- White cane sugar — yes, white. The SCOBY eats this. Trust the process.
- Wide-mouth glass vessel — 1 to 2 gallons. Never metal. Never plastic.
- Breathable cloth cover — tight-weave cotton or coffee filter, secured with a rubber band
- Cheesecloth — the weave is too loose. Fruit flies adore it.
- Flavored or herbal teas in 1F — save chamomile and earl grey for second fermentation
- Raw honey or maple syrup — they work, but unpredictably. Master plain sugar first.
- Distilled water — too pure. Filtered tap is the sweet spot.
The Brew, Step by Patient Step
Step 1: Build Your Sweet Tea Base
Boil 4 cups of filtered water. Steep 8 grams of loose tea (or 4 standard tea bags) for exactly 10 minutes. Remove the leaves. Stir in 1 cup of plain white sugar until it dissolves completely. Add 12 more cups of cool filtered water to bring the whole thing down to room temperature.
Step 2: Pitch the SCOBY
Gently slide your SCOBY into the cooled sweet tea. Pour in one full cup of starter liquid — this is the acidic shield that keeps mold and bad bacteria from setting up shop. Cover the jar with your cloth, secure it with a rubber band, and place it somewhere quiet, dim, and ideally between 72 and 78°F.
Step 3: Wait. (This Is the Hardest Part.)
Day one, nothing happens. Day three, a faint film. Day seven, a brand-new baby SCOBY floats on top like a translucent pancake. By day ten to fourteen, the brew should smell like apple cider with a slight tang and taste sweet-tart — not sour, not syrupy.
| Day | Flavor Profile | What to Do |
|---|---|---|
| Day 5 | Sweet, faintly tangy | Keep waiting |
| Day 8 | Balanced, apple-cider tang | Bottle now for sweeter brew |
| Day 12 | Sharp, vinegary edge | Bottle for classic kombucha |
| Day 14+ | Pure vinegar | Use as starter for next batch |
Step 4: Bottle, Flavor, and Carbonate
Reserve 1 cup of finished brew plus your SCOBY for the next batch. Pour the rest into thick-walled flip-top bottles, adding 1-2 teaspoons of fruit juice, fresh ginger, or pureed berries per 16oz. Seal tight. Leave at room temperature for 2 to 4 days. Refrigerate. Open carefully — over a sink, every single time.
Troubleshooting: The Real Problems You'll Face
Totally normal. New SCOBYs float, old ones sink, and a fresh baby will form on the surface either way. Don't touch it.
Yeast strands. Ugly, harmless, and a sign of a thriving culture. Strain at bottling if you don't love the look.
Underfermented. Give it three more days and re-taste. Cold rooms slow everything down dramatically.
That's mold. Green, black, or blue fuzz is not yeast — it's the end of that batch. Discard everything. Sanitize. Start over.
A Final Word From the Brew Bench
Kombucha rewards patience more than precision. The first batch will teach you something the second batch will fix, and by the fourth, you'll be flavoring with hibiscus and lavender and texting friends photos of your jar like a proud parent.
The SCOBY doesn't care if your kitchen is fancy. It cares that you let it work.
Start with a 2-gallon glass jar, a quality SCOBY, and a free Saturday. Your countertop is about to become the most interesting place in the house.
Key Takeaways
- Choosing the right how to make kombucha at home means matching the key features to your specific needs and budget
- Read real customer reviews and check the return policy before you commit
- Also covers: homemade kombucha recipe
- Also covers: first fermentation kombucha
- Also covers: beginner kombucha brewing
- Compare value across models — the priciest option is not always the best fit